Al's Homebrewery
Palos Hills, Illinois
Note to beginners and potential homebrewers: This is not a typical all-grain system. I had been brewing for many years using two, much simpler all-grain systems on my kitchen stove. I built this one because I like to tinker, not because a homebrewing system needs to be this complex. In fact, when brewing from extract, you can get by with just a large pot on a kitchen stove.
Long before I started homebrewing back in 1987, my hobby was photography. So, when I started rebuilding my home brewery, it was only natural for me to document the progress in photographs. The planning of the brewery took months, but the actual construction was completed in only three weekends. My previous two brewing systems were a JSP EasyMasherTM and, previous to that, a Zapap system. I originally started out with a 3-gallon enamel canning pot, but bought a 10-gallon Polar stainless steel kettle after about 5 batches.
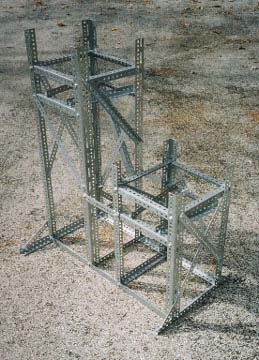
Building a stand was the first step, but I had to buy the stainless steel kettles and burners first so I could size the stand properly. There are many sources for stainless steel kettles, but not that many for really big ones. One inexpensive source sells large stainless steel tanks built for holding olive oil in restaurants... I suggest avoiding these because the metal is too thin. I have two nice 50,000 BTU burners (see the Amazon link below) and I mailordered two 18.75-gallon kettles, from a source that no longer sells them. I then built the stand around the burners and kettles. The stand was built from galvanized steel angles and flats (Builder's Square) and held together by bolts, lockwashers and nuts. I did a rough sketch on paper and then made adjustments as I was building it. I extended the corner verticals above the support surface because I wanted to minimize the risk that I would knock the kettles off. Given the size of the kettles, the likelyhood of pushing them off the stand was minimal, but I tend to err on the side of safety. Notice that I extended the two side pieces of the base to add in front-to-back stability. The cross-bracing is extremely important for making the stand sturdy, so don't skimp on these! Hacksawed galvanized angles are extremely sharp, so don't forget to file them down.
Note that these 50,000 BTU burners are fine for heating the mash and would be more than adequate for 10 gallon batches, but they are just barely enough for my 15- to 17-gallon batches. They are fine for the boil, but when it comes to heating sparge water, I really would rather have more BTUs. Furthermore, if you plan to switch to natural gas (Cajun Cadillac Cookers sells jets for natural gas too... default is propane) the BTUs drop to something like 40,000, which may even be underpowered for the boil. Yesterday, I ran across a 90,000 BTU (with natural gas) burner at a restaurant supply store... too bad it was $525.
I built the lower (kettle) stand such that I could fill a 6-gallon carboy via gravity. The upper stand (mash tun) was built such that the bottom of the mashtun would be just above the top of the kettle. This is slightly less height difference than in my previous system, but so far (about 25 batches) I've had no problems with stuck (or even slow) runoff. I haven't tried brewing with wheat or (even worse) rye, so these will be the litmus test. I have the option of raising the mash tun a few inches yet. Worst case, I could replace the uprights, but would probably need to add additional cross-bracing.
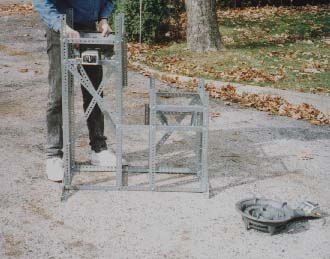
Next, I installed the burners. I compared many different brands of burners and chose these. They give a much more even heat than the "rocket engine"-type single-jet burners and have a peizoelectric starter built right in, so they start with just a twist of the knob. The burners are currently jetted for propane because I'm brewing outdoors for now. Once I move the brewery into its permanent indoor space (with an exhaust hood and forced makeup air), I'll re-jet the burners for natural gas. Despite the slight loss in BTUs, I prefer the convenience and the comfort of knowing I'll never run out of gas in the middle of a batch.
Currently, I store the system in the basement and move it outdoors when it's time to brew. If I planned to do this permanently, I would install swing-down wheels. Besides making it easier to move, it will also minimize the scratching of the zinc coating which protects the steel from rusting.
Next Page
To the BrewInfo Page (Home)
Copyright � 1997 Al Korzonas - All Rights Reserved