First, I have to explain why I even need a washer. Rather than
try and find a welder to weld a nipple or union into the kettle, I chose
to make my own bulkhead fitting (because buying one was far too expensive!).
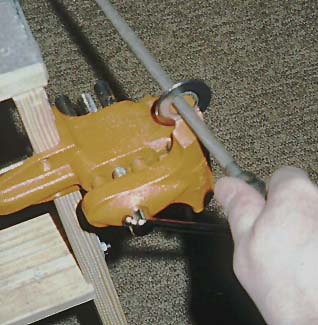
After I screwed the shortest stainless steel close nipple into the
ball valve and tee (on the kettle) or cross (on the mash tun), there was
still a large gap between the two. Luckily, I found stainless steel
washers at Ace Hardware that
were almost big enough. A little filing with a rat-tail file allowed the
nipple to fit through the whole in the washer. I really had to torque-down
the valve, but eventually, I got a leak-free fit and no welding.
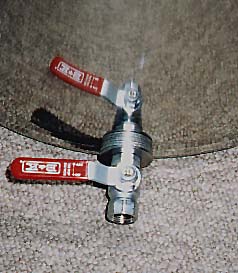
The mirror-smooth finish of this mash tun makes it look like there are
lots of washers there, but there are only 4. Note that there are two types
of ball valves made by this manufacturer. This one's bore is slightly smaller
than 3/8" whereas the other one has a full 3/8" bore. I recommend
you get the full-bore valve. While 3/8" is fine for the mash
tun (I still have to throttle down the flow), I have been considering
moving to a 1/2" ball valve to get faster flow from the kettle. I may
simply try the full-bore valve first. Indicentally, the finish on these
valves is rather thin and you will need to use quite a bit of torque on
the valve to get the "bulkhead fitting" to seal. I would
steer clear of an adjustable and open-end box wrenches, and 12-point sockets.
I recommend using either a closed-end box wrench or a 6-point socket
to avoid marring the finish.
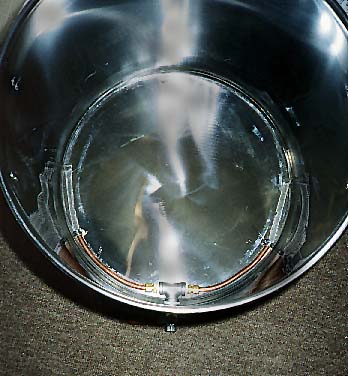
After installing the ball valves on both the mash tun and kettle, I turned my attention to the bimetal thermometer I had purchased for each one (available at McMaster-Carr). Although not mandatory, I chose to buy thermowells for them also. Given the fact that occasionally, I will have to urgently stir the mash or boil, I felt that the added protection of the thermowell outweighed the increased response time. I chose a 8" well for the TridentTM Mash System and a 6" well for the kettle, because I use an immersion chiller and needed the added room (as it turns out, it's a tight fit as it is). The thermowells were threaded with 3/4" male NPT threads and the threads did not reach all the way to the flat part of the "nut" end. This meant that I had to find nuts for both the inside and outside of the vessels. The outside nut didn't have to be "food grade" so I selected a simple galvanized electrical box nut. I'll have to keep an eye on it because the dissimilar metals are likely to cause galvanic corrosion.
Finding a suitable "food grade" nut for the inside was quite a challenge. The thermometer/thermowell manufacturer (Trend) makes a stainless steel NPT nut, but it was something like $15, so I passed on it and figured I'd come up with a cheaper alternative. Eventually, I came up with a reasonable solution: cut the NPT-threaded end off a copper Soldered Joint Female Adapter (soldered copper pipe to 3/4" female NPT) that I got at Ace Hardware. I could not crank-down the nuts enough to form a water-tight seal, so I ended up making my own teflon washer from a piece of teflon sheet (McMaster-Carr). The only snag is that again I have dissimilar metals and will have to watch for galvanic corrosion.
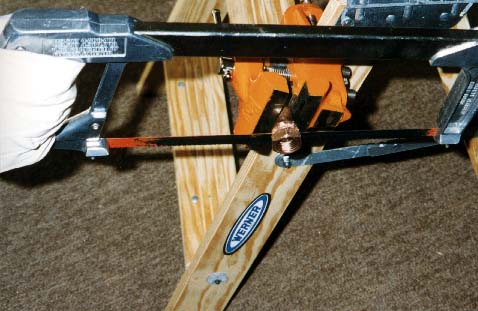
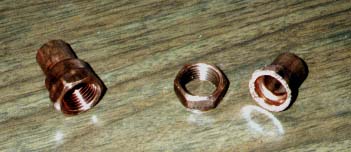 Here
we see the before and after photos of the Soldered Joint Female Adapter.
Here
we see the before and after photos of the Soldered Joint Female Adapter.
Copyright © 1997 Al Korzonas - All Rights Reserved